


2026年11月17日
How to Determine the Foundation for a Solar Carport
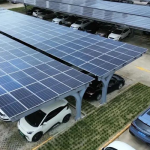
A solar carport is only as strong as what holds it into the ground. Panels, rails, and inverters get most of the attention, but the foundation decides whether your structure shrugs out a decade of storms — or ends up on your neighbor’s roof after the first serious wind event.
Unlike a rooftop system, asolar carportstands on its own. Its broad, flat canopy behaves like an airplane wing: wind flowing over and under the roof generatesuplift forcesthat pull the entire structure out of the ground. That single fact drives nearly every foundation decision.
This guide walks you through how to determine the correct foundation for a solar carport — from soil and load data to footing types and permits.
Why the Foundation Matters More for a Solar Carport Than Almost Any Other Structure
Three characteristics make carport foundations a serious engineering decision:
- Large sail area.A canopy covering two parked cars presents 30–60 m² of surface to the wind. Uplift and overturning moments are far larger than most homeowners expect.
- Elevated, freestanding design.There is no building to brace against. Every load path runs down the posts into the ground.
- It shelters something expensive.A carport failure damages vehicles, the PV array, and often the house next door — plus your insurance may deny the claim if the structure was not anchored to code.
Getting the foundation right up front typically costs 10–20% of the total project. Retrofitting or rebuilding after a failure costs everything.
Step 1: Know Your Ground — Evaluate Soil Conditions
Soil bearing capacity is the starting point of every foundation decision. The same 20 kW solar carport can need very different footings on two lots a mile apart.
Key soil factors to check:
- Soil type.Dense gravel and compacted sand offer good bearing capacity. Clay is trickier: it expands when wet, shrinks when dry, and loses strength seasonally. Fill soil and topsoil support almost nothing until properly compacted.
- Rock near the surface.Bedrock within reach of excavation or drilling can be an advantage (anchors bond directly to it) or a nuisance (helical piers can’t be installed).
- Water table and drainage.A high water table softens soil, corrodes steel posts, and heaves concrete in freeze–thaw climates.
- Frost depth.In cold regions, foundations must extend below the local frost line or heaving will crack and tilt the structure.
What to do:For small residential carports, a perusing geotechnical report from a neighbor’s build or the county can be enough. For commercial solar carport arrays, or any site with clay, fill, or water issues, pay for a simple soil probe test ($300–$800). It routinely saves four figures in the wrong concrete.
Step 2: Determine Your Design Loads — Wind, Snow, and Seismic
The foundation must resist the loads the canopy collects. Before choosing any footing, pin down three numbers from your local building authority or design-code maps:
- Design wind speed.In most codes this is an ultimate (3-second gust) speed with a risk category — often 90–150+ mph depending on region. Coastal and hurricane-prone areas sit at the top of the range.
- Ground snow load.In snowy climates, a wet snowpack can add 20–50+ psf to the canopy — a big vertical load, and ice shedding can create asymmetric forces.
- Seismic demand.In high-seismic zones, the posts and their connections need to resist lateral cycling, which often means larger concrete footings with proper embedment depth.
Then translate those into forces on the foundation:
- Uplift(pull-out at the weatherward posts) — usually the governing case.
- Download(compression at the leeward posts under snow plus wind pressing on the back side).
- Sliding and overturningat the base of each post.
A structural engineer or a manufacturer’s engineering package will run these numbers per ASCE 7 (or your national equivalent). Do not skip this: the footing size that a supplier stamps should match your site’s maps, not a generic default.
Step 3: Match Foundation Type to Site Conditions
There is no universally “best” solar carport foundation — only the best match for your soil, loads, climate, and budget. The main options:
1. Concrete Spread Footings / Poured Pads (the workhorse)
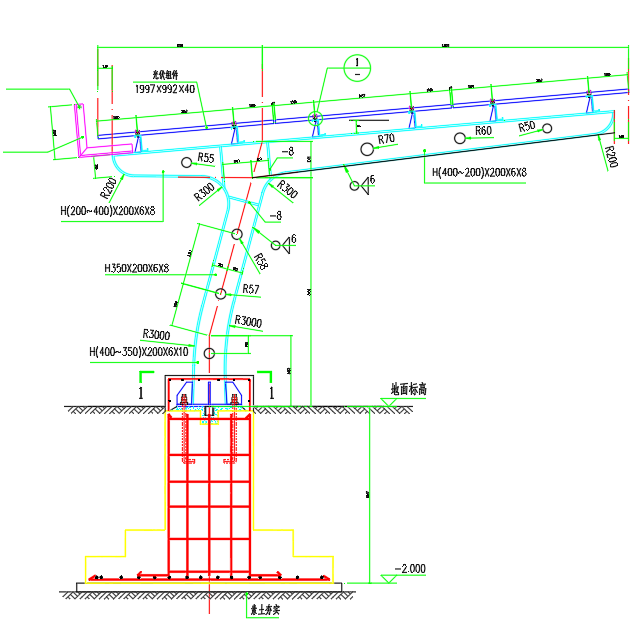
Posts are set in reinforced concrete pads, typically 450–900 mm (18–36 in) square and deep, with embedded base plates or post anchors.
- Best for:High wind and seismic zones, clay or variable soils, permanent commercial installations.
- Watch for:Must be poured below frost line in cold climates; requires excavation, rebar, and 7+ days of cure time before loading.
- Rule of thumb:In exposed coastal or hurricane zones, this is often theonlyoption inspectors will approve for larger arrays.
2. Helical Piers / Ground Screws
Steel shafts with helical plates are mechanically torqued into the soil until they reach design torque — verified load capacity on the spot.
- Best for:Good bearing soil at depth, sites wanting fast installation, minimal excavation, and easy removal (useful on leased land).
- Watch for:Useless in shallow bedrock or large cobble; capacity is soil-dependent, so a cheap pull-out test on one pier is wise for commercial jobs.
- Why installers love them:A two-person crew can put in dozens of piers in a day, with no cure time. For many residential solar carport projects, helical piers deliver the best strength-per-dollar.
3. Continuous Concrete Slab (a “carport pad”)
A 100–150 mm (4–6 in) reinforced slab the full footprint of the structure, with posts anchored into it.
- Best for:Sites that want a finished parking surface anyway; shallow-bedrock lots where digging deep footings is impractical.
- Watch for:A slab alone resists uplift mostly by its own weight — in high-wind areas it must be engineered and usually paired with footings or anchors at the uplift posts. Plan for slope and drainage so puddles don’t pool under cars.
4. Driven Pilings or Rock Anchors
Timber/steel piles driven deep, or chemical anchors drilled into sound bedrock.
- Best for:Very soft soils (piles) or rocky terrain (anchors).
- Watch for:Specialized equipment and contractors; higher mobilization cost on small sites.
5. Ballasted Pier Blocks / Gravel Pads
Weight resting on a prepared gravel pad, no penetration.
- Best for:Temporary or small canopies in low-wind regions on firm, level ground.
- Watch for:Most jurisdictions and warranty terms reject pure ballast for a freestanding solar carport in any wind-exposed location. Treat this as an edge case, not a default.
Quick comparison
| Foundation type | Uplift resistance | Install speed | Relative cost | Best site condition |
| Concrete footings | Excellent | Days + cure | Medium | High wind/seismic, clay |
| Helical piers | Very good (soil-dependent) | Hours | Medium | Firm soils, no shallow rock |
| Slab + anchors | Good–excellent (engineered) | Days + cure | High | Needs parking surface / shallow rock |
| Pilings / rock anchors | Excellent | Days | High | Soft soils / bedrock |
| Ballast blocks | Limited | Hours | Low | Small canopies, calm climates |
Step 4: Check Codes, Permits, and Paperwork
Before you dig:
- Building permit. Almost every jurisdiction requires one for a permanent solar carport, and the plan review will ask specifically for foundation details and structural calculations.
- Wind/snow load maps and frost depth from your local authority — these override generic manufacturer defaults.
- Engineer-stamped drawings for the anchorage are commonly required above ~10 kW or for any commercial array; some insurers require it regardless of size.
- HOA / zoning setbacks and height limits — carports often trip accessory-structure rules before they trip structural ones.
- Utility clearance and underground locate (call before you dig). One struck gas line ends the project and the budget.
Match your chosen foundation system to what the permit reviewer will actually accept — the cheapest footing is the one that passes inspection the first time.
Step 5: Design the Details That Decide Longevity
The difference between a 25-year solar carport and a rusty, leaning one is usually in the small stuff:
- Keep steel out of standing water. Set base plates or posts so the connection sits above finished grade; slope the pad 1–2% away from the structure.
- Corrosion protection. Hot-dip galvanized posts and anchors; in coastal zones consider stainless hardware or thicker coating systems.
- Proper embedment depth for post anchors into concrete (typically 20× anchor diameter or per manufacturer).
- Torque verification and inspection of every helical pier and anchor after installation, logged for warranty and insurance.
- Drainage under the canopy. Gutters or crowned pads prevent erosion undermining the footings year after year.
Five Mistakes That Sink Solar Carport Foundations
- Designing for gravity only. Uplift, not the weight of the panels, pulls carports down. If the calculation sheet shows no net-uplift case, get a different engineer.
- Copying a neighbor’s foundation. Two houses apart can differ in soil, exposure, and effective wind speed.
- Skipping frost depth to save concrete. Heave cracks footings and racks them out of plumb within a few winters.
- Undersizing for future snow/ice. A canopy overhang that collects drifting snow or shedding ice loads posts asymmetrically.
- Anchoring into uncompacted fill. Common on new subdivisions — the pad you pour today settles with the lot tomorrow. Verify subgrade compaction or go deeper.
FAQ
How deep should a solar carport foundation be?
Concrete footings in cold climates must extend below the local frost line (often 60–120 cm / 24–48 in). Helical piers are torqued to a depth that reaches load-bearing soil — commonly 1.2–2.4 m (4–8 ft). The governing answer always comes from your loads plus soil report, not a fixed number.
Concrete footings in cold climates must extend below the local frost line (often 60–120 cm / 24–48 in). Helical piers are torqued to a depth that reaches load-bearing soil — commonly 1.2–2.4 m (4–8 ft). The governing answer always comes from your loads plus soil report, not a fixed number.
Can I build a solar carport on an existing driveway slab?
Sometimes. An existing 100 mm residential slab is rarely thick or reinforced enough to anchor a freestanding canopy against uplift on its own. Options include saw-cutting and pouring new footing pads through the slab, using longer anchors into undisturbed soil below, or a full engineered overlay. Get the slab thickness and reinforcement verified before deciding.
Sometimes. An existing 100 mm residential slab is rarely thick or reinforced enough to anchor a freestanding canopy against uplift on its own. Options include saw-cutting and pouring new footing pads through the slab, using longer anchors into undisturbed soil below, or a full engineered overlay. Get the slab thickness and reinforcement verified before deciding.
Are helical piers better than concrete for a carport?
Neither is universally better. Helical piers win on installation speed, cure time, and removable installs; concrete footings win in very high wind/seismic demand, rocky sites, and wherever the permit reviewer is unfamiliar with pier certification. Many professional installers use piers by default and concrete where loads or soils demand it.
Neither is universally better. Helical piers win on installation speed, cure time, and removable installs; concrete footings win in very high wind/seismic demand, rocky sites, and wherever the permit reviewer is unfamiliar with pier certification. Many professional installers use piers by default and concrete where loads or soils demand it.
Do I really need a structural engineer for a residential solar carport?
For anything beyond a small kit carport, yes — most jurisdictions require stamped calculations for the permit anyway, and wind uplift on a canopy is genuinely unforgiving of rule-of-thumb anchoring.
For anything beyond a small kit carport, yes — most jurisdictions require stamped calculations for the permit anyway, and wind uplift on a canopy is genuinely unforgiving of rule-of-thumb anchoring.
The Bottom Line
Determining the right foundation for a solar carport comes down to four inputs: what’s under you (soil), what hits you (wind, snow, seismic), what your code requires (permits and stamped calcs), and what you’re willing to maintain (drainage and corrosion details). Nail those, and the canopy above will quietly earn its keep for 25+ years. Guess at them, and you’ve built the neighborhood’s most expensive lawn ornament.
If you’re planning an installation, start with the two cheapest, highest-leverage moves: pull your local design wind and snow load values, and get basic soil information for your lot. Everything else — footing type, size, and cost — follows from those two answers.